Do Dell Computers have webcams?
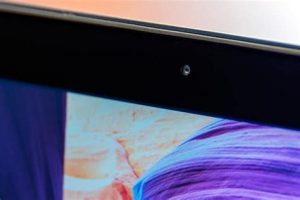
This post may contain affiliate links.As an Amazon Associate I earn from qualifying purchases.Activating a Webcam on Dell Computers. The majority of Dell’s laptops come with an integrated webcam. Many Dell all-in-one PCs and laptops come with an integrated webcam sitting just above the display. You can also add external webcam devices, whether built by Dell or other manufacturers, through a spare USB port.
How do I Turn on the camera on my Dell laptop?
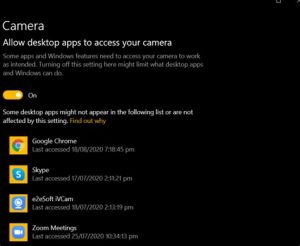
How Do I Turn on the Camera on My Dell Laptop? To turn on the webcam on a Dell laptop, power on the laptop and click the Start icon on the Windows screen. Next, click on All Programs and go to the Dell Webcam tab. In this tab, click on Webcam Central.
How do I connect a webcam to a computer?
Before connecting a webcam to a computer, lay out the webcam materials so you have a clear picture of what you need to do. Most webcams have a USB connection, a software disk for drivers, and a camera. The camera is where the lens is. Put the camera somewhere where you can see it and where it can see you.
Can you add a webcam to a Dell all-in-one?
You can use the program to record videos and photos to save to your computer or upload to the Web. Many Dell all-in-one PCs and laptops come with an integrated webcam sitting just above the display. You can also add external webcam devices, whether built by Dell or other manufacturers, through a spare USB port.
The webcam is one of the most important features of your laptop, especially if you use it daily for video chats with friends and family or for online meetings via Zoom. Therefore, you naturally want a webcam that delivers HD-quality images without blurring or other issues. Unfortunately, Dell’s built-in cameras do not offer the best quality. But all hope is not lost yet.
Depending on the connection your model requires, you can connect an external webcam to your Dell laptop via USB or WiFi. However, it is important that you buy a webcam that is compatible with your Dell laptop.
You don’t have to put up with blurry images or poor quality video chats. With the right webcam, you can enjoy HD quality images and smooth videos. In this blog post, you’ll learn how to easily connect a webcam to your Dell laptop. So let’s get right to it. Shall we?
How Do I Connect a Webcam to My Dell Laptop?
People opt for external webcams for various reasons. Be it because their laptop’s webcam stops working or because they are looking for better image quality. Dell laptops usually come with built-in webcams, which are sufficient in most cases (and certainly better than nothing), but they don’t offer the best image quality.
Therefore, external webcams might be a better alternative. Namely, these devices have advanced features like autofocus and autozoom that make them superior to laptop webcams. They also offer better image quality and more features for different occasions, such as gaming or video conferencing with friends/family via Skype.
But how do you connect an external webcam to your Dell laptop? Depending on the type of webcam, you can connect it via WiFi connection or USB.
Connecting a Webcam over a WiFi connection
As long as your laptop has a compatible wireless card, connecting an external webcam via WiFi should be easy. Follow the steps below:
- Connect the webcam to your router using an ethernet cable. Using the ethernet cable is a crucial step for configuration. However, it won’t be necessary once you’ve set up the device.
- Set up the wireless feature of your webcam using your home or office WiFi settings. In most cases, a screen will pop up requesting you to input various fields to set up the wireless feature, depending on the model of the webcam. Follow these instructions to complete the setup.
- Disconnect the ethernet cable and allow the webcam to connect to your laptop wirelessly.
- Check if the webcam is working correctly.
Connecting a webcam via a USB cable
If you purchased a USB webcam, a USB cable is the only way to connect the webcam to your laptop. You need to follow the steps below to successfully connect it to your Dell laptop.
Connect your webcam to your laptop
Find an available port on your laptop or computer, and plug one end of the USB cable into that slot. Then plug the other end of the cable into an available port on your webcam.
Install the camera drivers for the webcam
In order to use your webcam, you must first install the drivers from the CD that came with it. If you don’t have a CD, you’ll need to download them online. You can find the drivers and software on the manufacturer’s website.
However, if the webcam didn’t come with a CD/DVD, it’s very likely that the webcam doesn’t require software installation, as most webcams don’t these days. So before you try to search for software and drivers online, you should first try step three to see if the device can be installed without software.
Wait for the setup page
Once you have connected your webcam to your laptop, a page with installation instructions should appear on your screen. Follow the instructions to complete the installation.
Follow the installation instructions
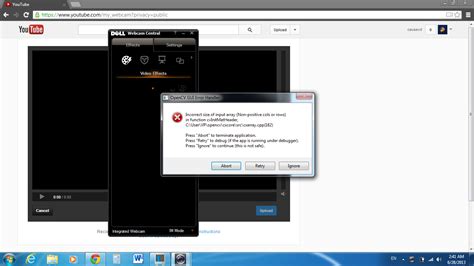
If your webcam drivers are not digitally signed, Windows may keep giving you a warning message that an authorized driver is being installed. Allow the installation to complete anyway.
Select Preferences and Settings
If the installation was successful, select your webcam in the new window that appears on your screen. You can then change the settings to suit your needs and preferences, such as brightness or resolution.
Ensure that the webcam is working properly
Test the webcam by opening a video calling application like Skype. If you can see yourself on the screen, your webcam is working properly and ready to use at any time. Also test the additional features.